
Quick answer: what are Froststrap mods?
Froststrap mods replace or add selected files that the Roblox desktop client can load locally. In practical terms, that usually means cosmetic or interface assets such as cursor sets, selected textures, sounds, loading graphics or other files supported by the bootstrapper. Froststrap prepares the folder structure and applies the selected files when Roblox starts.
This is different from injecting code into a Roblox experience. A legitimate Froststrap mod workflow does not promise admin commands, automatic wins, unlimited Robux or access to another player's account. Searches for Roblox mod menus or modified mobile APKs have a different and much riskier intent; they should not be treated as Froststrap features.
| Change type | Fits this guide? | Practical note |
|---|---|---|
| Custom cursor or Shift Lock cursor | Yes | Use a preset, import a cursor set or generate supported assets. |
| Cosmetic UI, texture or sound replacement | Usually | Compatibility depends on the current Roblox file layout and the mod package. |
| Fast Flag configuration | Separate feature | Use the Roblox Fast Flags guide; the allowlist limits what can take effect. |
| Script executor, exploit menu or free Robux tool | No | These are not Froststrap mods and can create account or device risk. |
How the Froststrap mod workflow fits together
The safest way to understand Froststrap mods is as a short pipeline. You select or create an asset, Froststrap places it in a managed mod folder, the bootstrapper copies the enabled files into the appropriate Roblox client location, and Roblox is launched. My Mods then gives you a place to enable, disable, reorder or retarget installed packages.
Froststrap v1.5.0 was published as the project's “Mods Update.” Its release notes describe the new My Mods page, drag-and-drop imports, Player and Studio targets, priority controls and quick access to the selected mod folder. Those controls make experiments easier to reverse, but they do not guarantee that every old community package will survive a later Roblox update.
How to create a mod with Froststrap Mod Generator
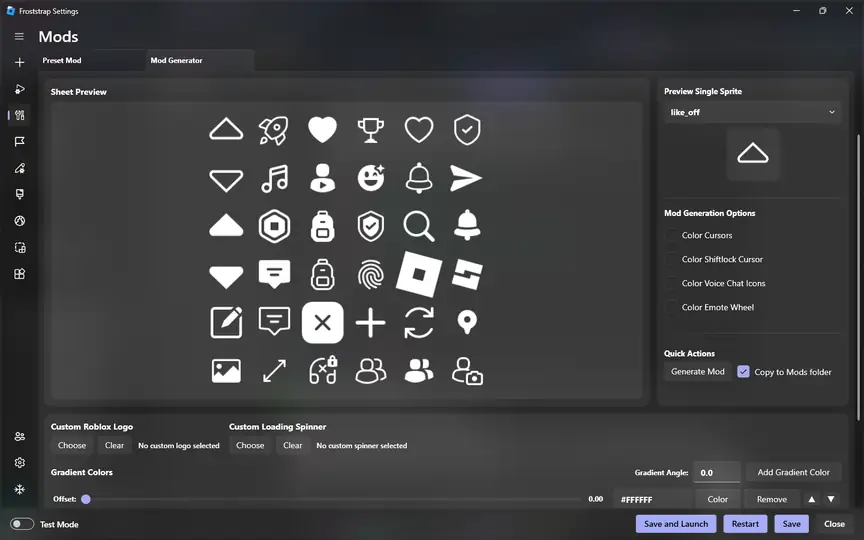
Mod Generator is the simplest starting point because Froststrap builds the expected files for you. The interface shown above includes sprite previews, color controls, optional custom Roblox logo and loading-spinner inputs, and a Copy to Mods folder option. Available controls can change between releases, so use the labels visible in your installed version rather than following an old screenshot blindly.
Start with one small visual change. A cursor or one generated UI asset is easier to verify than a large package that replaces many folders. Launch Roblox after each change, confirm that normal controls still work, and only then add another mod.
Open Froststrap Settings and choose Mods
Launch the settings window, open the Mods area and select Mod Generator. If the page is missing, verify that you installed the current official release from Froststrap's GitHub repository.
Choose a supported asset
Select a preset sprite or provide only the custom files requested by the generator. Avoid random archives that include executables, scripts or unrelated installers.
Preview and generate
Use the built-in preview where available. Generate the mod and enable the option that copies it into the managed Mods folder only after the preview looks correct.
Save, launch and test
Save the Froststrap configuration, launch Roblox and check the exact screen or cursor state you changed. If the result is wrong, close Roblox before disabling or removing the package.
How to import and manage custom cursor mods
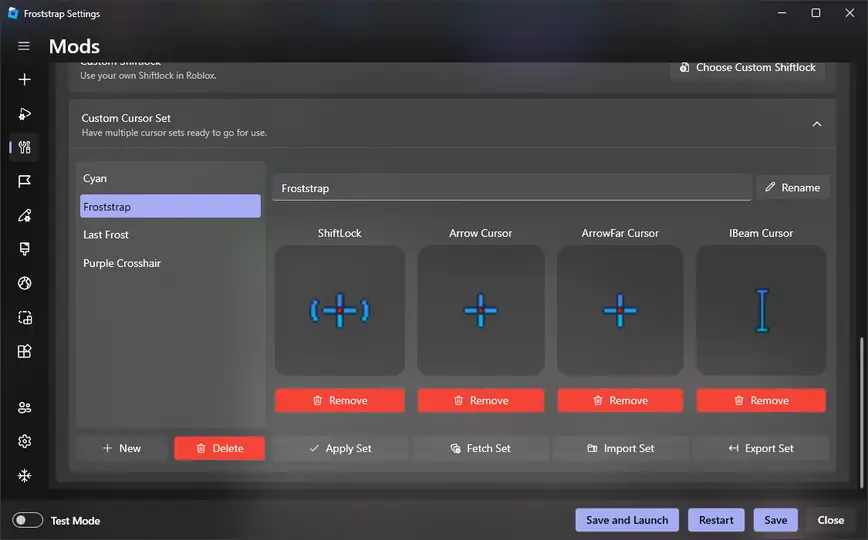
Cursor sets are a useful first Froststrap mod because the result is obvious and the affected files are limited. The current interface can keep multiple sets, show individual Shift Lock, arrow, far-arrow and I-beam cursor slots, and provide import or export actions. The exact cursor files required by a community package may differ, so inspect the archive before importing it.
Treat an imported set as untrusted content until you have checked its file types. A cursor package should contain expected image or cursor assets—not an EXE, PowerShell script, browser extension or password-protected downloader. Community screenshots can demonstrate a design, but they do not prove that a separate download is safe.
Keep the original archive outside the active Mods folder
Store a clean copy separately so you can compare files or reinstall without downloading from an unknown mirror again.
Import one cursor set
Use the Froststrap import control and verify that the expected cursor slots appear. Do not import several similarly named sets at once.
Apply the set and relaunch Roblox
Test normal pointer, text-entry and Shift Lock states. If one state is blank or distorted, disable the set and confirm the default cursor returns.
My Mods targets, priority and folder rules
My Mods is the control center for packages already known to Froststrap. The v1.5.0 release notes describe four target states: Player, Studio, both or disabled. Use Player for changes intended only for the normal Roblox client. Use Studio only when a package is explicitly designed for Roblox Studio. Selecting both without a reason increases the number of places you must troubleshoot.
Priority decides which package wins when two mods provide the same destination file. Froststrap's release notes state that a higher priority is applied later, and items at the top apply last. In other words, a later-applied file can overwrite an earlier one. This is useful for a small override package, but confusing when two full UI packs overlap.
| My Mods control | Recommended use | Common mistake |
|---|---|---|
| Player target | Cosmetic changes for the normal Roblox client | Expecting the same files to appear in Studio. |
| Studio target | Assets specifically tested with Roblox Studio | Applying a player-only package to development tools. |
| Both | Only when the package documents support for both | Using it as a default and doubling conflict points. |
| Disabled | Temporary rollback without deleting the package | Forgetting to save and relaunch after changing status. |
| Priority | Resolve one known overlapping destination file | Stacking several large packs and guessing which one wins. |
What a working cosmetic mod can change
A successful asset mod changes presentation on your computer; it does not change server-side game rules. Depending on the package and current Roblox client, you may see a different cursor, icon, texture, loading element or sound. Other players normally do not receive your local files, and a local texture does not grant an item, ability or currency.
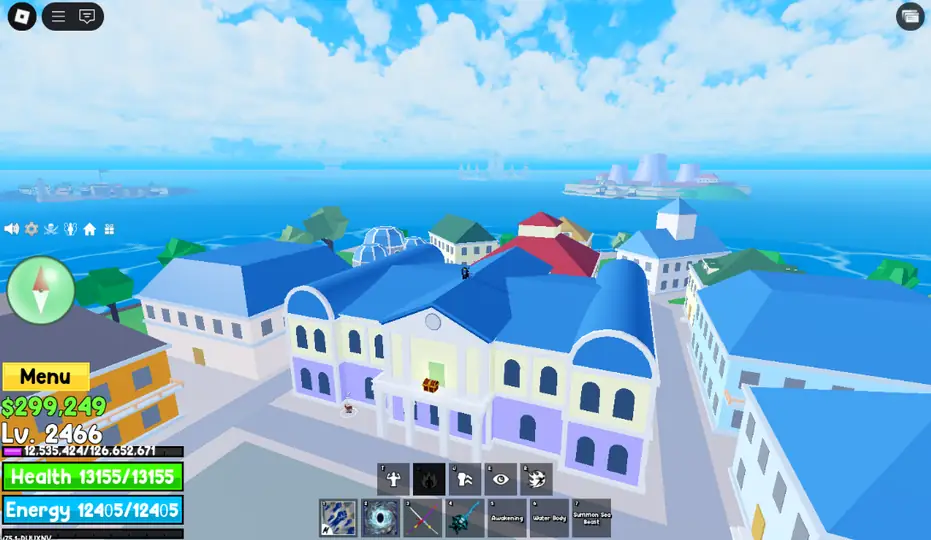
The screenshot below is an example of a locally changed visual result in Roblox. It should not be read as a promise that Froststrap improves graphics, performance or gameplay in every experience. A Roblox update can rename, move or protect an asset path, which may cause a previously working package to stop applying.
Why a Froststrap mod may not work
Most failures come from a stale path, a disabled target, a conflict or an incomplete package—not from a missing “enable all mods” switch. Troubleshoot with one package enabled and close Roblox before changing files. That creates a clean test and prevents the running client from holding an old asset in memory.
If every package stopped working after a Roblox or Froststrap update, first launch once with all mods disabled. Confirm the unmodified client starts, then re-enable the smallest known-good package. The broader Froststrap troubleshooting guide covers installation, permissions, network and launch failures that are not specific to mods.
| Symptom | Likely cause | Safest next check |
|---|---|---|
| Mod appears in My Mods but nothing changes | Disabled target, stale destination path or Roblox update | Confirm Player/Studio target, save, relaunch and test one file. |
| Only part of a UI pack appears | Package is incomplete or some paths changed | Review the package structure and remove unsupported files. |
| One mod replaces another | Both packages write the same destination file | Disable one package or set an intentional priority order. |
| Roblox fails after enabling a package | Broken or incompatible asset | Disable the newest package, relaunch cleanly and restore defaults. |
| Cursor is missing in one state | Required cursor slot was not included | Re-import a complete set or return to a built-in preset. |
How to remove Froststrap mods and return to default
Rollback should be part of the plan before you import a package. Disabling a mod first is safer than deleting several folders because it preserves the package while confirming whether that package caused the issue. Once Roblox works normally, you can remove the disabled package from My Mods or delete only its identified folder through Froststrap's folder shortcut.
Do not delete random Roblox installation folders to remove one cosmetic change. Froststrap and Roblox can rebuild some client files, but broad deletion makes it harder to tell whether the original problem was the mod, the bootstrapper configuration or the installation itself.
Close Roblox and Roblox Studio
Wait until their processes have ended so the active client cannot keep old files open.
Disable the newest or highest-priority mod
Save the setting and launch once. If the problem disappears, you have isolated the likely conflicting package.
Remove only the identified package
Use My Mods or the selected mod-folder shortcut. Keep unrelated working packages untouched.
Reset broader settings only if necessary
If a clean mod list still fails, follow the installation and reset guide instead of repeatedly downloading third-party packages.
Limits and safety boundaries
This guide documents the official Froststrap interface and stable v1.5.0 release information checked on July 20, 2026. Roblox updates frequently, community packages can become stale, and the same asset may behave differently across experiences. No independent guide can verify every community archive or promise that a client modification will remain compatible.
Use the official Froststrap repository for the bootstrapper itself. For community mods, prefer transparent archives with expected asset files, a clear author and a reversible installation. Avoid packages that ask you to disable security software, run an unrelated executable, paste a script, provide a Roblox cookie or promise currency and competitive advantages.
- Back up or export a working configuration before a large change.
- Test one package at a time and keep Player/Studio targets intentional.
- Treat overlapping destination files as a priority conflict, not a performance tweak.
- Remove a package that requires executables, credentials or security exclusions.
- Recheck compatibility after Froststrap or Roblox updates.
Froststrap mods FAQ
Are Froststrap mods safe?
Froststrap's built-in Mod Generator and My Mods controls provide a reversible way to manage local assets, but safety still depends on the files you import. Prefer expected image, cursor, sound or texture files from a transparent source. Do not run unrelated executables or scripts included with a supposed cosmetic mod.
Where is the Froststrap Mods folder?
The current My Mods interface includes a shortcut to open the selected mod's folder. Using that control is safer than guessing a path because folders and package structure can change between versions.
Can Froststrap install Roblox mod menus?
No. This guide covers local asset and appearance changes managed by the bootstrapper. Script executors, exploit menus, modified APKs and free-Robux tools are different products and are not legitimate Froststrap mod features.
Why did my Froststrap mods stop working after an update?
Roblox may have changed an asset path or file format, Froststrap may have changed how a target is applied, or two packages may now conflict. Disable all mods, confirm Roblox launches normally, then re-enable one known-good package and review its target and priority.
Can Froststrap mods get my Roblox account banned?
A local cosmetic asset is not the same as cheating, but no third party can guarantee enforcement outcomes for every file or future policy. Avoid scripts, automation, exploit tools, credential requests and packages that claim gameplay advantages. Review Roblox's current rules and use only changes you understand.
Official sources and policy references
- Froststrap v1.5.0 release notesOfficial Mods Update notes for My Mods, targets, priority, drag-and-drop import and folder controls.
- Froststrap/Froststrap repositoryOfficial public source repository and release ownership reference.
- Official bundled mod resourcesRepository examples of cursor assets and other mod resources included with the project.
- Roblox cheating and exploiting guidancePlatform guidance relevant to distinguishing cosmetic assets from exploit tools.